Diamond painting is an exciting and innovative type of the craft that is a mix of paint-by-numbers and cross-stitch. A favorite pastime for those who want to produce colorful and vibrant artwork. You guessed it, Below we dive deep into giving you the 411 of how to make your own diamond painting image the right way in exacting and detail.TRAILING CONTENTS
Choose the Right Image
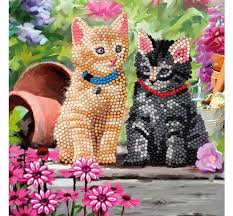
Picking a perfect photo is the first important part of making your own diamond painting. You want a clean, high resolution image with lots of detail. Resolution of no less than 300 dpi is often preferred by the manufacturer to ensure that the smaller elements replicate properly into the diamond art. Your image subject should also contain a variety of colors but not be overly intricate, as images are extremely detailed or shaded may be hard to execute with diamonds.
Convert the Image
After you have uploaded your picture, the next thing you need to do is to turn it into pattern for diamond painting. There are dedicated services and software for this — they analyze your image and transform it into a color-grid mapping to certain diamond colors. Every colour matches with a diamond colour code that is needed for ordering the stepped forward packages and preserving matters separate and correct to your work area.
Gather Your Materials
Begin your diamond painting project with the following important materials:
Printed Canvas : This is the base of your painting.
Colored Diamonds: These resin that are oftenreferred to as drills and come in two shapes: round and square.
An applicator tool: This tool assists in selecting and positioning diamonds onto the canvas.
Adhesive — With any standard canvas, it should already have an adhesive pre-coat. If yours is not, you will need to glue on a thin layer.
Even RTFB Says it A tray to keep your diamond stones in as you work.
Arrange Your Workspace
Make sure you have a dedicated workspace for crafting, to allow you to be more productive. Proper lighting is important; a light pad is commonly used by the crafters, which will light the canvas from the rear side, help easily finding and placing the diamonds. By colour coding your diamonds and keeping your tool kit where it can easily be reached you are able to make each stage easier.
Start Placing the Diamonds
Start at one corner of the canvas and cover continuously to the other side. Remove the protective film that covers the adhesive of the canvas only a few inches at a time so it does not get dirty or lose its tackiness. Use an applicator tool to take the diamonds by pressing it into the wax or gel that you have loaded in the tip of your tool. Tep 6: Plac the diamond in colour-coordinated space on diamond canvas and press carefully or simply place ended diamond on the canvas for a long diamond drill set.
Final Touches
Once all diamond placement is complete, you should roll a rolling pin or similar over the canvas to make one final press down on any loose diamonds and secure them in place. This secures all the pieces nicely so your art will stay together nicely.
Display Your Masterpiece
After that point, you can frame your diamond painting to safeguard it and make it display-ready. Find a complimentary colored and size frame that fits your dimentions.
DIY Diamond Painting Image creating
There is a great deal of satisfaction to be had in completing the process of actually making a diamond painting eigenes bild for someone looking to create a finished diamond painting from a personal photograph. This is one of life´s little pleasures that give you a beautiful personalized piece of art.
Within a detailed process, you are taking every step to make sure that the beginning is perfect and the progress remains uninterrupted to unveil the stunning piece that you can showcase with a promise of pride.